Inside the Making of a Gown (B. Young)
")
GUEST BLOG: Evening gown designer, Alexis Lantz of Alexis Lantz Couture
In the fall of 2011, I was stopped in my tracks by Taylor Swift’s Wonderstruck perfume ad that I saw in a department store.
I immediately fell in love with the gown and wanted to make a version of it for my younger sister Brooklynne Young, who would be competing in the Miss Texas Teen USA 2012 pageant the following month.
After tossing around the idea for a few days I concluded that it would be too rushed to try to do the gown with so little time left. Instead, I used the gown as inspiration for my sisters’ opening number dresses.

Brooklynne Young – Miss Fort Worth Teen USA 2011 wearing her opening number cocktail dress for the Miss Texas Teen USA 2012 pageant. Photo by TexasPageantScene.com
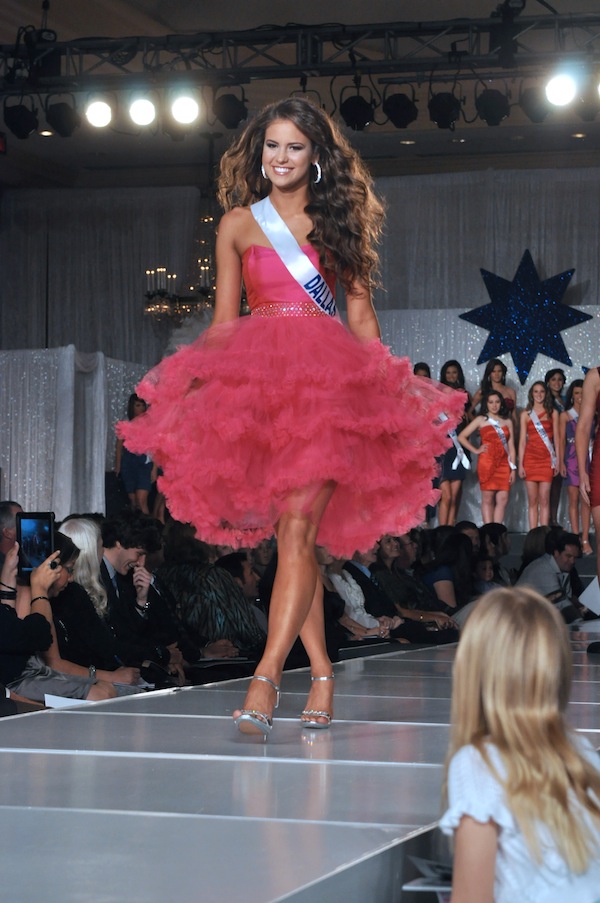
BreAnna Young – Miss Dallas Teen USA 2011 wearing her opening number cocktail dress for the Miss Texas Teen USA 2012 pageant. Photo by TexasPageantScene.com
The rules for opening number that year were jewel tones with limited to no beading. Because I could not make the dresses stand out with beading, I decided to employ movement and volume instead.
(Tip: I am a firm believer that, for a pageant gown, there needs to be some aspect that catches the eye, be it beading, movement, color, sheen, and/or volume. Care must be taken, however, to not combine too many of those elements into one design. This just ends up looking like a disaster.)

BreAnna Young, Overall Evening Gown Winner at the Miss Texas’ Outstanding Teen 2010 pageant
Last year, I decided that I wanted to take the plunge and go all out with Brooklynne’s evening gown for Miss Texas Teen USA 2013. I knew that I wanted to use the same blush pink silk duchess satin for the bodice that I used for my other sister’s evening gown when she competed in the Miss Texas’ Outstanding Teen pageant.
For a gown with this much ruffle and tulle it was important that the pink be just right – not too “little girl pink,” but just enough pink to compliment the romantic softness of the design. I then began searching for the perfect shade of matching blush pink tulle. I searched every tulle supplier in the US and abroad, but every sample was either too pink or too peach. I then decided to make the gown with silk organza, because the fabric supplier for the blush pink silk duchess satin also carried the same color in silk organza.
Unfortunately, the supplier only had 40 yards left, which would not be enough to create the volume that I needed for the skirt.
(Tip: always order more fabric than you think you will need – and then add 10% to that!)
Thus, I decided to incorporate tulle, in a complimentary color, in with the organza. I imagined that a golden champagne tulle would look gorgeous with golden shadow Swarovski crystals around the empire waistline. After testing several different shades of champagne tulle, I concluded that it looked too “dirty” against the beautiful pale blush pink.
I then decided to just use ivory tulle because, mixed in with the organza, it would give a soft, cloud-like effect to the gown. I ended up ordering 75 yards of 54-inch tulle (for the large skirt panels), 400 yards of 12-inch tulle (for the large ruffles), and a whopping 1,150 yards of 6-inch tulle (to be doubled over and sewn into the smallest ruffles).
(Tip: all tulle is not created equal. Some of the cheaper tulles are made overseas, and are not always nylon, even when they claim to be – a lesson I learned the hard way (tip within a tip: if it sounds too cheap/good to be true, it probably is). Look for tulle made in the USA.)
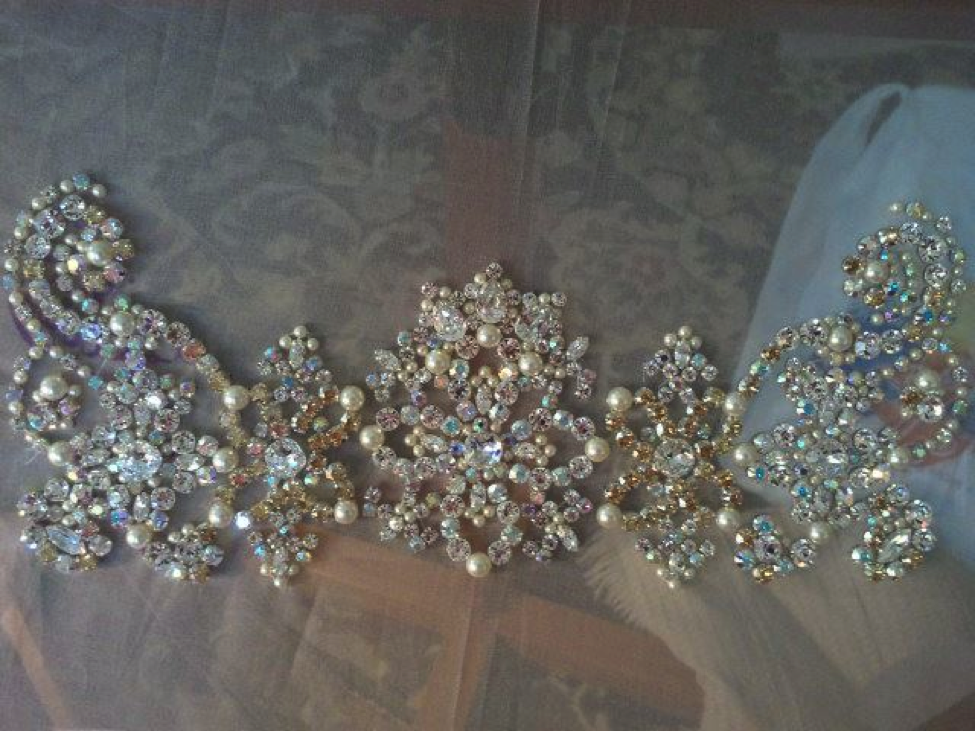
At this point, I felt reasonably sure about the skirt fabrics so I put that aside in favor of beginning the crystal beadwork for the gown. The beading was done on a base of the blush pink silk organza, which was stretched across a large embroidery frame.
I used a mix of Swarovski AB, Clear, and Golden Shadow Chaton Rose Montees (in stone sizes ranging from SS20-40), as well as some large Swarovski cushion and marquis cut accent stones. Some Swarovski Ivory Pearls (4 mm and 8 mm) were added for depth and texture. I loved how the pearls brought an elegance and softness to the gown.
A close-up of the front waistline beading in progress.
After finishing the beadwork, I then happened upon, what appeared to be, the perfect blush peach pink dye that I could use to turn all of the ivory tulle into the perfect pink! I was overjoyed! The first rule of dying fabric is to test, test, and re-test.
(Tip: Different types of dye are used for different fabrics. For example, acid dyes are used for natural fibers (silk and wool) and also work well for nylon. Fiber reactive dyes are used for cotton, rayon, hemp, and linen.)
My first several testers came out way too peach. Remember the color wheel you learned about in grade school? Well, the opposite of warm peach/orangey tones are cool blue tones, and that is what I needed to add to cool down the color.
(Tip: though I usually use professional dye, in a crunch you can combine RIT dye with your acid or fiber reactive dyes because it has a combination of fiber reactive and acid dyes – thus why they call it “all-purpose.”)
I found that when I added a touch of the cool blue tones to the warm blush peach pink it was transformed into that elusive blush peach pink that I had been searching for.
The next step was to gather all 1,150 yards of the 6 inch tulle into ruffles.
(Tip: if you plan to sew something before you dye it, make sure you use the same thread color as the color you want the fabric to end up, because your polyester thread will not take the dye.)
Then, those ruffles were sewn to the 12-inch tulle. At this point it was time to dye the mounds of ruffles (I did not gather the straight side of the 12 inch tulle yet because it would have knotted when dyed). I used a 15-gallon stainless steel pot to do the job because it is important that the fabric have enough space to move freely, otherwise the dye will be absorbed unevenly.
The ruffles were dyed in 25 yard batches and I dyed them progressively lighter in order to achieve an ombre effect to the skirt. Once dyed, the straight side of the 12-inch strips was gathered and, I’ll be honest, my entire workroom looked like a cotton candy factory had exploded!
A photo illustrating the ombre effect
Now came the fun part – draping the gown.
I had already made the bodice and attached several layers of alternating organza and tulle to the natural waistline.
I used a dress form and begin the process of attaching the ruffles to the longest layer. I started with ruffles that I had left ivory, and attached those around the bottom. I repeated this process as I gradually moved up the gown with progressively darker pink ruffles. I angled the front a bit to achieve a slight asymmetrical effect. An early iteration of the gown had an organza top layer with an organza raw-edged ruffle, but removed it after determining that the tulle was much softer looking.
The finishing touch was to attach the beadwork pieces to the waistline (it was like icing a cake; literally, remember those Barbie cakes? Yeah, I know you were thinking it 😉
I trimmed away the excess organza and carefully hand-tacked the appliques onto the bodice (true confession: I ran out of time and did most of this in the car on the drive to the pageant in Houston – where there is a will there’s a way!).
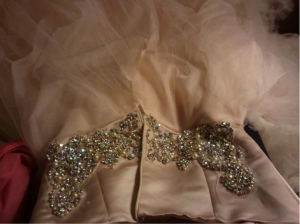
Photo of the back of the gown as the beadwork was being applied
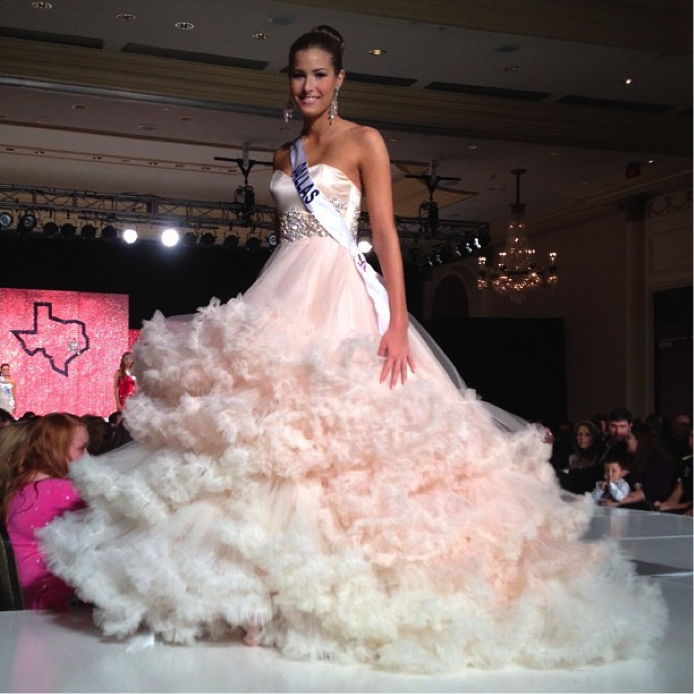
In the end I was in love with how it turned out. I knew it was a risk to make such an over-the-top gown, but I believe that pageants should be fun and I like bringing something new to the stage. I had a blast making it and adored watching Brooklynne model it.
I admit, I was slightly worried about whether she would fit on the stage – and she did! (barely).
And for the Despicable Me fans out there… I would be remiss if I didn’t mention that it was SO FLUFFAY!
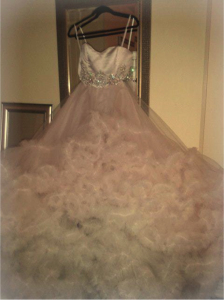
Here is the final product:
www.AlexisLantz.com
This article was written by Alexis Lantz
Alexis Lantz is a custom gown designer, creating one-of-a-kind masterpieces for her clientele. Alexis Lantz Couture gowns have graced the stage at Miss Texas USA, Miss Texas Teen USA and Miss Oklahoma USA, worn by semifinalists, finalists, and state titleholders. Her success as a gown designer and pageant contestant was also on display when she created her own gown to place Top 5 at Miss Texas USA 2007. You can view her talented gown creations at www.AlexisLantz.com